I'm alive!
When I said that blogging was going to be kept to a bare minimum I really did not mean that there would be no blogging at all....it just sort of happened that way. After two days in New Jersey finishing things up at my old (!) job, Jason and I hopped a plane to Miami for a few days of much needed rest and relaxation. My plan had been to write up a few posts before we left so that you all wouldn't be left hanging for so long but by the time I got home Friday evening, unpacked my work stuff, and repacked my vacation stuff it was late and we had to get up at 5am the next morning to catch our flight.
Excuses, excuses...I know.
But the good news (for you) is that I am back and with some time on my hands....until next Tuesday when I start my new job at least!
Wednesday, June 30, 2010
Wednesday, June 23, 2010
I'll Be Back
Hi there! So you may have noticed things have been a little quieter than usual around these parts. I'm deep in the throes of my last week at my current (soon to be old!) job and things are a bit hectic as I attempt to cram several weeks worth of work into a few remaining days. Not to mention all the other life stuff to deal with (like trying to determine whether our renters insurance will cover any part of Jason's lost wedding ring.....it doesn't). All in all, I'm pretty close to being burnt out.
As a result the blogging is going to be kept to a bare minimum for the next little bit...but never fear! I'll be back to a regular blogging schedule next week with my usual food for thought on cooking and married life.
Stay tuned (and if you are on the East Coast, stay cool)!
As a result the blogging is going to be kept to a bare minimum for the next little bit...but never fear! I'll be back to a regular blogging schedule next week with my usual food for thought on cooking and married life.
Stay tuned (and if you are on the East Coast, stay cool)!
Monday, June 21, 2010
287 Days
This weekend while I was shopping up a storm (more on that later), Jason was off on a canoe/kayak/camping trip with his father, younger brother, uncle, and cousin in West Virginia. This is becoming an annual outing for the men in Jason’s family and something Jason in particular looks forward to every year. Not only does he get to spend some quality time with his brother and father, but he gets to practice his recently acquired whitewater kayaking skills.
He came home late last night with some great pictures and a bag full of stinky river clothes. One thing he did not come home with, however, was his wedding ring.

One minute it was on, the next it was gone, probably lost during a run down some rapids thanks to a combination of sunscreen and water which make for some slippery fingers. It is probably on the bottom of the New River somewhere (unless a catfish got to it first).

 If anything, I am a little sad to think that the ring that I gave him on our wedding day in front of all our friends and family will never be seen again. We will replace it, of course, but I wonder if the new ring will hold the same sentimental value as the ring that Jason wore for the first 287 days (give or take) of our lives together. But then I remind myself that the ring is merely a symbol and that even though I am disappointed, all I felt was relief when the “really bad news” Jason had for me when he walked in the door last night was just a lost ring and that no one we love was hurt, sick or worse. At the end of the day, it is just a ring after all.
Also, sh*t happens.
And now I don’t feel so bad about all the money I spent on new work clothes this weekend :)
He came home late last night with some great pictures and a bag full of stinky river clothes. One thing he did not come home with, however, was his wedding ring.

The New River near Beckley, WV...somewhere in its depths lies Jason's wedding ring
One minute it was on, the next it was gone, probably lost during a run down some rapids thanks to a combination of sunscreen and water which make for some slippery fingers. It is probably on the bottom of the New River somewhere (unless a catfish got to it first).

Look at him go!
Jason’s family members were worried that I would be mad. I actually wasn’t mad at all. Jason is not one to lose things (in the time we’ve known each other I can’t actually think of another thing he has lost) and while wearing an expensive piece of jewelry during a day of physical activity might not have been the smartest thing to do in retrospect, he and I have both done it numerous times before.
 If anything, I am a little sad to think that the ring that I gave him on our wedding day in front of all our friends and family will never be seen again. We will replace it, of course, but I wonder if the new ring will hold the same sentimental value as the ring that Jason wore for the first 287 days (give or take) of our lives together. But then I remind myself that the ring is merely a symbol and that even though I am disappointed, all I felt was relief when the “really bad news” Jason had for me when he walked in the door last night was just a lost ring and that no one we love was hurt, sick or worse. At the end of the day, it is just a ring after all.
Also, sh*t happens.
And now I don’t feel so bad about all the money I spent on new work clothes this weekend :)
Friday, June 18, 2010
Dress for Success
Almost as soon as I made the decision to take a new job and return to life as an office worker I started thinking about one thing: clothes. It has been three years since I had to go into an office every day and in that time I have purchased maybe 2-3 articles of work appropriate clothing. Sure, I have plenty of clothes hanging my closet left over from my previous office-going days but…come on! they are more than THREE YEARS OLD.
So I have decided to go on a mini-shopping spree this weekend to augment my current work wardrobe and bring it into 2010. Now I am trying to be very thoughtful about this so as not to waste money unnecessarily. To that end I have made a list of the things that I would like to find. My list of must-haves includes the following:


Given the emails I’ve received recently about the sales at stores like Ann Taylor, Loft, Banana Republic, and J. Crew I’m hoping I’ll be able to find what I’m looking for without shelling out too much. Fortunately I have a gift card or two left over from my birthday and am about to start a new job with a new salary :)
I’ll let you know how it goes!
So I have decided to go on a mini-shopping spree this weekend to augment my current work wardrobe and bring it into 2010. Now I am trying to be very thoughtful about this so as not to waste money unnecessarily. To that end I have made a list of the things that I would like to find. My list of must-haves includes the following:
- A couple of skirts, in particular I'd like a black or khaki (pencil?) skirt that I can mix and match with various tops
- A variety of sleeveless tops, shells, and camis that I can layer with cardigans and blazers—most of what I currently have are on their last legs and/or not really appropriate for wearing on their own. Since I am going to be commuting via metro for at least the first few months at my new job (you know, during the dead of summer) I want lightweight tops that can stand by themselves as well.
- At least one but maybe two blazers that I can mix and match with various skirts and pants (I have a lot of wintery blazers but not summer ones)
- New pair of black heels, preferably ones that are comfortable enough to walk to/from the metro in


Given the emails I’ve received recently about the sales at stores like Ann Taylor, Loft, Banana Republic, and J. Crew I’m hoping I’ll be able to find what I’m looking for without shelling out too much. Fortunately I have a gift card or two left over from my birthday and am about to start a new job with a new salary :)
I’ll let you know how it goes!
Wednesday, June 16, 2010
Top Chef DC Instant Reaction
So the inaugural episode of Top Chef DC just aired (get it, inaugural cause it's in DC...ok, I'm tired and getting a little punchy...) and all I can really think about is what a jerk that Angelo guy is. I disliked him from the first name-dropping glimpse we got of him. (Also, did he really work with all those people-- can someone do a fact check on that, please.) He is obviously going to be cocky "villain" of the season. Also, I knew crazy John was going home the minute he said he was doing dessert-- don't these people know that doing a dessert on Top Chef is the kiss of death?!
But I am really enjoying being able to recognize the various locations they are shooting in and am excited for the season!
For more inside info on this season's Top Chef, check out Capital Spice. They are planning to do more of an inside scoop/behind the scenes type post after each episode (and have even been involved in one of the "public events").
Monday, June 14, 2010
The Jason Seal of Approval
Last week was very meat heavy what with the southwestern brisket (which we ate several times given the large quantity it made) and our first foray into Korean BBQ Saturday night with our friends Matt and Stephanie. Given that, we decided that we needed to balance things out with more veggie-focused meals this week.
Last night we did just that, enjoying my first attempt at making a summer (and vegetarian) favorite—Gazpacho. This could not be a better (or easier) meal—chop up some veggies, throw them in the blender, add seasonings to taste, and chill in the fridge for a few hours until ready to eat. It’s even better when you have farm fresh produce to put into it (like the tomatoes we bought during Saturday’s trip to the farmers market). Serve with some toasted, garlicky bread and you’ve got yourself a real crowd pleaser.
My aforementioned friend Stephanie recommended Everyday Food’s recipe so I used that as a base although I made some significant changes to the amounts (given the recipe was part of its “Cooking for One” column) as well as added a few ingredients to make it more our speed. I think it turned out pretty well. I wasn’t sure how Jason would like it (he had never had gazpacho before) but the first words out of his mouth upon tasting were “I really like it. You’ll have to make this again.” Consider this recipe to be Jason-approved!

Gazpacho with Toasted Garlicky Bread
Adapted generously from Everyday Food
Ingredients:
3 medium tomatoes, cut into chunks
1 medium cucumber, peeled and diced
½ large red pepper, diced
½ medium red onion, diced
2 garlic cloves, minced
1 ½ teaspoons red wine vinegar
1 TBL olive oil, plus more for serving
2 generous shots of hot sauce
Salt and pepper
French baguette, sliced
1 garlic clove, sliced in half
1.Place 2-3 TBL each of the cucumber, red pepper, and red onion in a container and set aside for serving.
2.Place tomatoes into a blender or food processor and puree until almost smooth. Add remaining cucumber, red pepper, red onion, garlic, vinegar, 1 TBL olive oil, hot sauce, and generous amounts of salt and pepper. Puree until you reach the desired consistency.
3.Chill in the refrigerator for at least 30 minutes (I left ours in for about 3 hours).
4.Right before serving, drizzle olive oil on each side of the sliced bread. Toast under the broiler until golden brown, about 1-2 minutes per side. Rub each side of toasted bread with garlic clove.
5.Check gazpacho for seasonings. Divide into two bowls. Top with reserved diced vegetables and drizzle with olive oil. Serve with garlicky bread.
Sunday, June 13, 2010
Summer Berry Pie
The first thing that I thought off when we got home from the farmers market yesterday (and I realized that we bought more berries than we could realistically eat in the few days before some of the more delicate ones—ahem, raspberries—would start to go bad) was pie. One of the best things about summer is the ability to make wonderful, fresh fruit pies. While a lot of you might associate the holidays, and especially Thanksgiving, with pie to me nothing says summer like homemade pie. Maybe that is because I like fruit pies more than pumpkin and pecan (the traditional fall pies) or maybe because I make blueberry pie every June as part of my Father’s Day gift to my dad. Regardless, my thoughts were consumed with pie as soon as we walked in the door.

Fortunately, my old friend Smitten Kitchen had a number of great step-by-step tutorials on making pie crust that made it all seem a bit more doable. Since I followed her instructions to a “t” I won’t go into the step-by-step here. You can find her all-butter pie dough recipe here and her tips for rolling and crimping here. I will, however, offer a few suggestions/things I learned in my initial attempt at making pie crust from scratch:


In terms of the pie filling, I ended up using another one of SK’s recipes as a general guide for my Summer Berry Pie. All in all the pie (crust and filling) turned out phenomenally. Given the juiciness of the berries I probably could have added a bit more cornstarch to the filling but even though it ran a bit, it still tasted incredibly good. Really. Words cannot accurately describe how good this pie is—all thanks to some exceptional fresh and local berries.


Summer Berry Pie
Adapted from Smitten Kitchen
Ingredients:
1 recipe of SK’s All Butter, Really Flaky Pie Dough
1 ½ cups fresh raspberries, rinsed
1 ½ cups fresh blackberries, rinsed
1 ½ cups fresh strawberries, rinsed and quartered
4 TBL cornstarch
2/3 cup sugar
1/8 teaspoon salt
Juice of half a lemon
Vanilla ice cream or whipped cream (optional)
1.Gently combine berries, cornstarch, sugar, salt, and lemon juice in a large bowl. Set aside.
2.Roll out half of chilled dough (use the larger one if you divided them unevenly)on a well-floured work surface so that you have a 12-13 inch round. Gently transfer rolled out dough into a 9 inch pie plate. Trim so you have a ½ inch overhang.
3.Using a slotted spoon, transfer berry mixture into the pie shell-try to leave as much of the liquid that has collected as possible (otherwise your crust will be soggy).
4.Roll out remaining chilled dough so that you have a 12 inch round. Gently drape over top of pie. Trim so that you have a 1 inch overhang. Fold the overhang (from both top and bottom crust) under to seal the crust. Crimp decoratively.
5.Cut slits in the top of the pie to allow steam to escape.
6.Bake on a cookie/baking sheet at 400 for 20-25 minutes (the baking sheet is key so you don’t end up with boiled over fruit juice/melted butter burning on the bottom of your oven). Make sure the oven rack is positioned in the center of the oven so you don’t brown the top too fast. Lower heat to 350 and continue to bake for another 25-30 minutes until fruit is bubbly and crust is golden brown. If the edges start to get too brown before the pie is done, you can cover them with aluminum foil to prevent burning. Cool on a wire rack. Serve warm or at room temperature with vanilla ice cream or whipped cream if you’d like.

Look at how gorgeous these berries are!
I’ve made many pies before but never my own pie dough. Shocking, I know. Usually I opt for the Pillsbury dough that you find in the refrigerated section of the grocery store—the one that you just unroll and drop in a pie plate. Pie dough has always seemed a bit intimidating to me for some reason—maybe it’s the need for cutting the butter into the flour or the fact that I have limited counter space on which to roll out the dough. But using the premade stuff with those glorious berries seemed wrong somehow. Like I’d being doing them a great disservice by using it. So I decided to suck it up and try my hand at homemade crust. Fortunately, my old friend Smitten Kitchen had a number of great step-by-step tutorials on making pie crust that made it all seem a bit more doable. Since I followed her instructions to a “t” I won’t go into the step-by-step here. You can find her all-butter pie dough recipe here and her tips for rolling and crimping here. I will, however, offer a few suggestions/things I learned in my initial attempt at making pie crust from scratch:
- Make sure you don’t leave your butter in too big of pieces. I thought I had achieved “tiny peas” as SK recommended but as I was rolling it out it looked like some pieces were a little big. As a result, when I pulled the pie out of the oven it seemed like some of the butter had melted/oozed out of the crust more than it probably should have. (Still tasted and looked good though—but the pie plate was a bit greasy feeling).
- It is really important that you shape the dough into real discs before chilling it. It is much more difficult to get a true round during the rolling process if you are starting with an oblong.
- SK’s rolling tips of “roll, lift, turn, repeat” really do make it so much easier to get a good, even circle (assuming you did number 2 correctly)
- Definitely flour the heck out of your rolling surface and your rolling pin. Make sure to re-flour the rolling pin every so often.

Don't those look like "tiny peas" to you??

Notice how not round these discs are.
In terms of the pie filling, I ended up using another one of SK’s recipes as a general guide for my Summer Berry Pie. All in all the pie (crust and filling) turned out phenomenally. Given the juiciness of the berries I probably could have added a bit more cornstarch to the filling but even though it ran a bit, it still tasted incredibly good. Really. Words cannot accurately describe how good this pie is—all thanks to some exceptional fresh and local berries.


Summer Berry Pie
Adapted from Smitten Kitchen
Ingredients:
1 recipe of SK’s All Butter, Really Flaky Pie Dough
1 ½ cups fresh raspberries, rinsed
1 ½ cups fresh blackberries, rinsed
1 ½ cups fresh strawberries, rinsed and quartered
4 TBL cornstarch
2/3 cup sugar
1/8 teaspoon salt
Juice of half a lemon
Vanilla ice cream or whipped cream (optional)
1.Gently combine berries, cornstarch, sugar, salt, and lemon juice in a large bowl. Set aside.
2.Roll out half of chilled dough (use the larger one if you divided them unevenly)on a well-floured work surface so that you have a 12-13 inch round. Gently transfer rolled out dough into a 9 inch pie plate. Trim so you have a ½ inch overhang.
3.Using a slotted spoon, transfer berry mixture into the pie shell-try to leave as much of the liquid that has collected as possible (otherwise your crust will be soggy).
4.Roll out remaining chilled dough so that you have a 12 inch round. Gently drape over top of pie. Trim so that you have a 1 inch overhang. Fold the overhang (from both top and bottom crust) under to seal the crust. Crimp decoratively.
5.Cut slits in the top of the pie to allow steam to escape.
6.Bake on a cookie/baking sheet at 400 for 20-25 minutes (the baking sheet is key so you don’t end up with boiled over fruit juice/melted butter burning on the bottom of your oven). Make sure the oven rack is positioned in the center of the oven so you don’t brown the top too fast. Lower heat to 350 and continue to bake for another 25-30 minutes until fruit is bubbly and crust is golden brown. If the edges start to get too brown before the pie is done, you can cover them with aluminum foil to prevent burning. Cool on a wire rack. Serve warm or at room temperature with vanilla ice cream or whipped cream if you’d like.
Saturday, June 12, 2010
What a Way to Start the Day!
What do you get when you combine a bagel sandwich and iced coffee with the fruit-filled bounty of a June farmers market (all of which is only a 5 minute walk away)?

The perfect way to start the day!
Fruit pie and pickle recipes coming soon :)

This week's farmers market haul--strawberries, tomatoes, blackberries, raspberries, vidalia onion, blueberries, yellow squash, cherries, and pickling cucumbers. Yes, we got a little carried away with the fruit. There were also peaches and apricots but I resisted getting one of everything.
The perfect way to start the day!
Fruit pie and pickle recipes coming soon :)
Thursday, June 10, 2010
Book Review: Animal, Vegetable, Miracle

From http://www.animalvegetablemiracle.com
I hosted book club this month (tonight, in fact), and as hostess it fell upon me to decide upon this month’s selection. Given that most of the books on my to-read list are still in hardback (and we try to stick with paperbacks when possible), I decided to go with a book that had been on my list for quite a while—Barbara Kingsolver’s Animal, Vegetable, Miracle. I am not sure how it went over with the rest of the group (I’m guessing it wasn’t widely loved), but I really enjoyed it.
While Barbara Kingsolver is a critically acclaimed novelist, AVM is more of a memoir telling the story of her family’s experiences trying to eat only locally grown/produced food for a year. That’s right everything they eat—both animal and vegetable—had to come from within a couple hundred miles of their home in Southwestern Virginia (although each family member is allowed to pick one non-local thing to continue eating which ranged from coffee to dried fruit). Their task is made somewhat easier by the fact they live on a farm and put significant effort into growing vegetables and even raising chickens and turkeys which they then eat. In addition to the story of their life on the farm and their experiences with eating locally, there is a lot of factual information about American farming, the food industry, as well as seasonal menus and recipe ideas.
Although I found certain portions of the narrative a bit preachy or a little too in the weeds at times (e.g., there was a lot of information about growing asparagus, some of which made my eyes glaze over), I was generally engaged. Once I got into it, it was a fairly quick read. Kingsolver can obviously tell a story and I really enjoyed the life on the farm vignettes in particular.
But more importantly, it also made me think. Most of the time, I buy produce without really considering where it comes from. I think we do a pretty good job of not buying a lot of things out of season (with the exception of bananas which Jason eats every single morning and the lettuces and tomatoes we generally eat year round), but that isn’t necessarily a conscious decision. Kingsolver makes a good case for eating locally—not only are there significant environmental benefits from not eating food that has to be trucked or flown in from halfway across the country or even the world, but it also means supporting local farmers and eating food when it was meant to be eaten, when it is at its peak of freshness and flavor. Those are all things I can get behind.
One day when we have the space, I am sure that we will have a garden that includes fruits and vegetables. Until then I am going to try and make more of a concerted effort to eat in-season and buy locally where we can. We are really fortunate to have a large weekly farmers market at our doorstep right now and I am going to take full advantage while I can. I’ve also been thinking about participating in community-sponsored agriculture (CSA) for awhile now so maybe this year will be the year I actually take the plunge. Big changes often start with small steps—we’ll see what happens!
Wednesday, June 9, 2010
Take Two
Tonight we had brisket sandwiches for dinner. (And corn on the cob-- my favorite.)

I put cole slaw on top of mine.
It might have been one of the easiest and best meals I've ever made.
So good in fact, I am seriously reconsidering my anti-leftovers stance.

I put cole slaw on top of mine.
It might have been one of the easiest and best meals I've ever made.
So good in fact, I am seriously reconsidering my anti-leftovers stance.
Tuesday, June 8, 2010
The Times They Are A-Changin'
There is some big news in our household that I thought I should share with those of you out there still reading my little blog…I got a new job! After 3+ years of working from home, I will be back in the real world come July. I’m pretty excited about the opportunity to try something new (I have been in my current job—my first out of grad school-- for the last six years) and because this is a big step up for me in terms of roles/responsibilities, salary, benefits, EVERYTHING. The only downside to my new role is that it may require a move. I am going to be working for the federal government (!) and while you might think that would equal DC, the agency I am going to be working for is actually headquartered outside Baltimore. As of now, I will be in the DC office until September at least, but after that is a big question mark. Chances are I will have to be in the main office which means that Jason and I will move –probably to the Maryland suburbs of DC since neither one of us are all that anxious to leave our friends and everything we know in the DC area behind. But working in the DC office has not been taken off the table YET so I’m cautiously optimistic. Regardless of where we end up, there will be a lot of changes ahead as we might finally get to the point where we can BUY A HOUSE! So for those of you who may be a little tired of the food-focused posts and are waiting for more newlywed adventures/life posts—stay tuned…you may be in for more than you bargained for soon!
In the meantime, one of the biggest things on Jason’s mind regarding my job change is what this will mean for his daily dinners. Obviously, it has been much easier for me to whip up a nice meal every night (and have dinner on the table soon after Jason gets home from work) with me working from home. While I am sure that some adjustments may have to be made once I start commuting, I am still planning on maintaining my role as resident cook—I enjoy cooking too much to let it slide. But I realize that some things may change—we may rely on takeout more often than we do now, I may do more prep work on the weekends, or we may eat more leftovers. There is also a little thing called a Crockpot which can be a great way to have a hot meal as soon as you walk in the door with minimal effort. A meal like the one I made for dinner tonight—Smitten Kitchen’s Southwestern Pulled Brisket (how’s that for a segue?!)
I have been eyeing this recipe for quite some time and decided that this week was the week I was going to give it a try. Jason and I are big brisket fans (I much prefer barbequed brisket to pulled pork when given the choice) and this seemed so easy, I knew I had to give it a try. And easy it was. You start by searing the brisket in a pan and then sautéing sliced onion, smashed garlic, and a variety of smoky spices until soft and fragrant. Add some apple cider vinegar, a couple of chipotles, canned tomatoes, and molasses and you got an incredibly flavorful liquid in which to cook your meat. Set the Crockpot on low and let it sit for 8-10 hours and you end up with brisket so tender it literally falls apart. I decided to follow SK’s lead and strain and reduce the sauce until it had thickened slightly and the flavors had concentrated. But you could just as easily leave it as is, making dinner all the more simple. I served the brisket with cole slaw which was a nice cool foil to the smoky-spiciness of the meat. This makes quite a bit—enough for us to have sandwiches for dinner tomorrow night too.
With dinners like this, I don’t think Jason has too much to worry about!


Southwestern Pulled Brisket
Adapted (Just barely) from Smitten Kitchen
Ingredients:
1 3lb beef brisket
2 TBL vegetable oil
5 cloves garlic, peeled and smashed
1 yellow onion, thinly sliced
1 TBL chili powder
2 teaspoons ground coriander
2 teaspoons ground cumin
¼ cup apple cider vinegar
1 ½ cups water
1 (14.5 ounce) can whole peeled tomatoes, with their juices
1-2 chipotles en adobo (I used two and ended up with a pretty spicy brisket—if you are not a big spice fan, you may want to cut back to one)
2 bay leaves
¼ cup molasses
1.Heat a large, heavy skillet over medium-high heat. Season brisket generously with salt and pepper. Add the meat and cook until browned on both sides (about 5 minutes per side). Transfer meat to a slow cooker. Return skillet to heat.
2.Add garlic, onion, chili powder, cumin, and coriander to drippings in the skillet and stir until beginning to soften and fragrant about 1 minute. Add vinegar and boil until it’s almost gone, scrapping the bottom of the pan with a wooden spoon. Stir in water and pour mixture over brisket.
3.Crush the tomatoes (either breaking them apart with a fork or your fingers) and add to the slow cooker along with their juices. Add chipotles, bay leaves, and molasses. Cover the cooker and set on low. Cook until it pulls apart easily with a fork, 8-10 hours (I did about 9-9.5 hours).
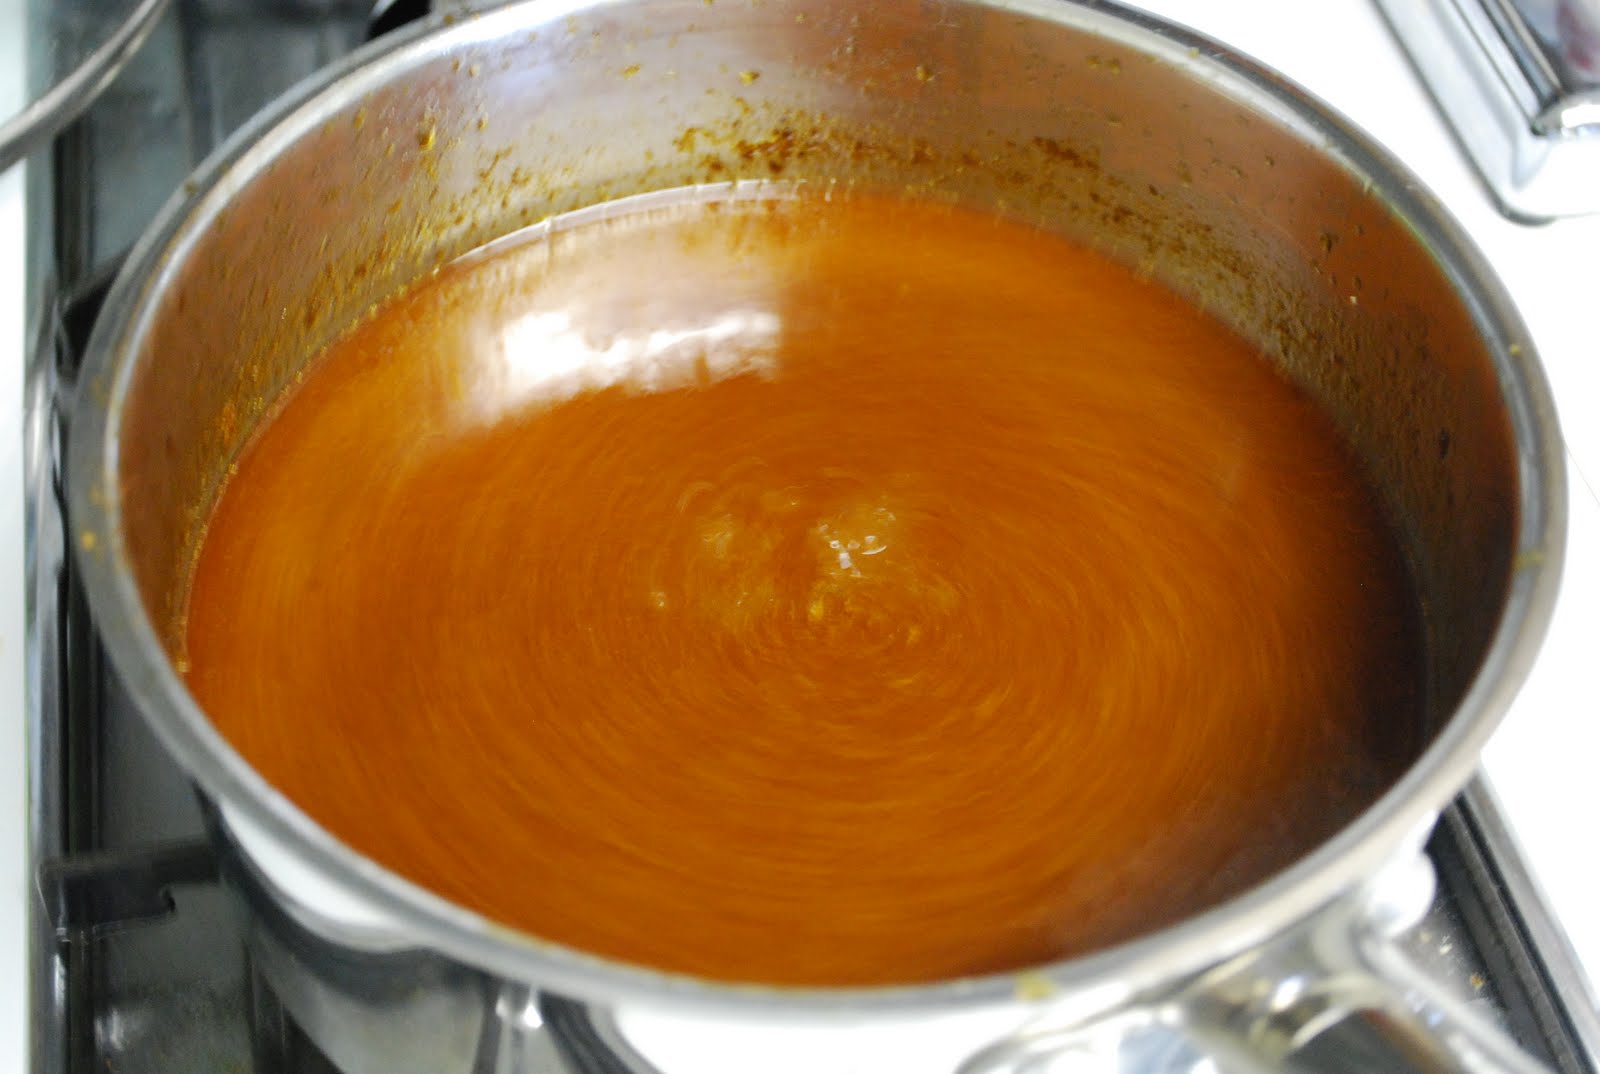
4.Remove the brisket to a dish, pulled it with two forks and cover with aluminum foil. Strain the cooking liquid into a saucepan (discard the leftover vegetables) and simmer until reduced by half. Check for seasonings and pour over pulled brisket. (You could also skip this step and pull the brisket it original cooking liquid—just make sure to remove the two bay leaves.)
In the meantime, one of the biggest things on Jason’s mind regarding my job change is what this will mean for his daily dinners. Obviously, it has been much easier for me to whip up a nice meal every night (and have dinner on the table soon after Jason gets home from work) with me working from home. While I am sure that some adjustments may have to be made once I start commuting, I am still planning on maintaining my role as resident cook—I enjoy cooking too much to let it slide. But I realize that some things may change—we may rely on takeout more often than we do now, I may do more prep work on the weekends, or we may eat more leftovers. There is also a little thing called a Crockpot which can be a great way to have a hot meal as soon as you walk in the door with minimal effort. A meal like the one I made for dinner tonight—Smitten Kitchen’s Southwestern Pulled Brisket (how’s that for a segue?!)
I have been eyeing this recipe for quite some time and decided that this week was the week I was going to give it a try. Jason and I are big brisket fans (I much prefer barbequed brisket to pulled pork when given the choice) and this seemed so easy, I knew I had to give it a try. And easy it was. You start by searing the brisket in a pan and then sautéing sliced onion, smashed garlic, and a variety of smoky spices until soft and fragrant. Add some apple cider vinegar, a couple of chipotles, canned tomatoes, and molasses and you got an incredibly flavorful liquid in which to cook your meat. Set the Crockpot on low and let it sit for 8-10 hours and you end up with brisket so tender it literally falls apart. I decided to follow SK’s lead and strain and reduce the sauce until it had thickened slightly and the flavors had concentrated. But you could just as easily leave it as is, making dinner all the more simple. I served the brisket with cole slaw which was a nice cool foil to the smoky-spiciness of the meat. This makes quite a bit—enough for us to have sandwiches for dinner tomorrow night too.
With dinners like this, I don’t think Jason has too much to worry about!

The brisket as it embarks on its journey to deliciousness

A little over 9 hours later, it has arrived!


Southwestern Pulled Brisket
Adapted (Just barely) from Smitten Kitchen
Ingredients:
1 3lb beef brisket
2 TBL vegetable oil
5 cloves garlic, peeled and smashed
1 yellow onion, thinly sliced
1 TBL chili powder
2 teaspoons ground coriander
2 teaspoons ground cumin
¼ cup apple cider vinegar
1 ½ cups water
1 (14.5 ounce) can whole peeled tomatoes, with their juices
1-2 chipotles en adobo (I used two and ended up with a pretty spicy brisket—if you are not a big spice fan, you may want to cut back to one)
2 bay leaves
¼ cup molasses
1.Heat a large, heavy skillet over medium-high heat. Season brisket generously with salt and pepper. Add the meat and cook until browned on both sides (about 5 minutes per side). Transfer meat to a slow cooker. Return skillet to heat.
2.Add garlic, onion, chili powder, cumin, and coriander to drippings in the skillet and stir until beginning to soften and fragrant about 1 minute. Add vinegar and boil until it’s almost gone, scrapping the bottom of the pan with a wooden spoon. Stir in water and pour mixture over brisket.
3.Crush the tomatoes (either breaking them apart with a fork or your fingers) and add to the slow cooker along with their juices. Add chipotles, bay leaves, and molasses. Cover the cooker and set on low. Cook until it pulls apart easily with a fork, 8-10 hours (I did about 9-9.5 hours).
4.Remove the brisket to a dish, pulled it with two forks and cover with aluminum foil. Strain the cooking liquid into a saucepan (discard the leftover vegetables) and simmer until reduced by half. Check for seasonings and pour over pulled brisket. (You could also skip this step and pull the brisket it original cooking liquid—just make sure to remove the two bay leaves.)
Monday, June 7, 2010
Race Weekend
Everyone has their hobbies/interests. For some people (like me), it is cooking. For others it’s mountain biking or kayaking. For Jason’s dad, it’s cars. He is a true car aficionado---he knows everything there is to know about cars, does all his own auto maintenance, and has even built at least one car completely from parts. Some of this he has passed on to Jason who has his own encyclopedia-like knowledge of car makes/models and does most of the maintenance on his own car (interestingly enough, though, he has not offered to do any of the maintenance on mine yet!).
In addition to knowing a lot about cars, Jason’s dad also races them. Yes, that’s right—races them. In fact, Jason’s dad has raced cars for over 40 years! (He took a few years off while Jason and his brother were little at Jason’s mother’s request, but other than that he’s been racing steadily for the last four decades.) For the 3+ years Jason and I have been together I have heard a lot about the race car and the various race tracks his dad goes to several times a year but had never experienced a race weekend for myself.
Until last weekend, that is.
That’s right. Last weekend Jason and I (along with his mother) served as “pit crew” for Jason’s dad’s race in Summit Point, WV. Truth be told, being pit crew was not as glamorous as what you see on TV which is a good thing since I know next to nothing about cars and how they work. Basically it meant that we got to be in the holding area for all the cars and help out the driver (in this case, Jason’s dad) if need be. Jason actually did quite a bit to help get the car ready (e.g., checked tire pressure, jacked the car up, changed from the dry tires to the rain tires and then back again), but I mostly sat around and soaked it all in.

There were 9 different race groups at Summit Point—each group consisted of different types of race cars. You may not know this but a lot of “regular cars” can be made into race cars. In fact, Mazda Miatas are the most popular class of cars to race in the mid-Atlantic area (because, according to Jason’s dad, they are relatively inexpensive and easy to handle). But there were two race groups of what I would call “real race cars” and Jason’s dad was in one of them (in fact, his race group is the fastest group). He drives a Formula Ford, here is what it looks like:

Unfortunately, despite how much cooler these cars are than boring old Mazda Miatas (which are dime a dozen if you ask me), they are dying off a little bit—his dad’s race group only had 8 cars in it (compared to like 40+ in the Miata groups) and he was the only Formula Ford running. Which meant that he “won” his race and got a checkered flag.

All in all, it was an interesting weekend—I definitely learned a lot more about cars than I probably ever needed to know but I feel like I got to know my father-in-law a lot better in the process.

In addition to knowing a lot about cars, Jason’s dad also races them. Yes, that’s right—races them. In fact, Jason’s dad has raced cars for over 40 years! (He took a few years off while Jason and his brother were little at Jason’s mother’s request, but other than that he’s been racing steadily for the last four decades.) For the 3+ years Jason and I have been together I have heard a lot about the race car and the various race tracks his dad goes to several times a year but had never experienced a race weekend for myself.
Until last weekend, that is.
That’s right. Last weekend Jason and I (along with his mother) served as “pit crew” for Jason’s dad’s race in Summit Point, WV. Truth be told, being pit crew was not as glamorous as what you see on TV which is a good thing since I know next to nothing about cars and how they work. Basically it meant that we got to be in the holding area for all the cars and help out the driver (in this case, Jason’s dad) if need be. Jason actually did quite a bit to help get the car ready (e.g., checked tire pressure, jacked the car up, changed from the dry tires to the rain tires and then back again), but I mostly sat around and soaked it all in.

Jason checking the tire pressure on his dad's care before the practice/qualifying run
There were 9 different race groups at Summit Point—each group consisted of different types of race cars. You may not know this but a lot of “regular cars” can be made into race cars. In fact, Mazda Miatas are the most popular class of cars to race in the mid-Atlantic area (because, according to Jason’s dad, they are relatively inexpensive and easy to handle). But there were two race groups of what I would call “real race cars” and Jason’s dad was in one of them (in fact, his race group is the fastest group). He drives a Formula Ford, here is what it looks like:

This is the race car in the pit paddock

Jason's dad pulling into the grid (where the cars enter/exit the track) after his victory lap with the checkered flag.
All in all, it was an interesting weekend—I definitely learned a lot more about cars than I probably ever needed to know but I feel like I got to know my father-in-law a lot better in the process.

An action shot of the race (not very close up given I don't have a good zoom lens) but you can see one of the other car types (a DSR) coming up behind Jason's dad's car. Considering they were going close to 100 mph when I took the picture, it's pretty good, don't you think?
Friday, June 4, 2010
Jason's Birthday Fiesta: Saving the Best for Last
Tiramisu is one of my all-time favorite desserts. I distinctly remember the first time I ate it—in Sorrento, Italy, in the restaurant of a small hotel where I stayed when I went on a school-sponsored Easter Break trip to Italy and Greece when I was 16. I don’t remember much about the rest of the meal there, but I do remember the tiramisu—rich and creamy with the hints of chocolate and coffee. I was hooked and that combination of flavors has been a real favorite ever since. Jason is also a lover of the chocolate and coffee flavor combo---I think I may have officially made him mine with my espresso brownies early on in our dating life—so it was only a matter time until he fell in love with tiramisu as well.
Not long after discovering Smitten Kitchen, I came across her recipe for Tiramisu Cake and knew that I had to try it at some point. Cut to Jason’s birthday last year when I first tried the recipe in cupcake form. At the time we were still engaged and living separately and I thought it would be easier to give him some cupcakes to take home than try and package up half of a two-layer cake. To say that he liked the cupcakes would be an understatement. The recipe was good but I still wanted to try the full cake form and so when I had a little celebratory dinner for my friend Lauren’s engagement this winter, I decided to give it a shot. While it didn’t disappoint, it wasn’t exactly how I wanted it. Both in cake and cupcake form, I found the cake layer to be a bit dry. And to me, there is nothing worse than dry cake. Jason didn’t seem to notice, however, and when it came time to select his birthday dinner he chose that as his birthday cake.
But I decided to try something a little different. After spending sometime looking for tips for ensuring a moist cake, I ended up back on Smitten Kitchen’s website reading through the Tiramisu Cake post comments to see if I could come up with a solution to my dry cake problem. Several other people had mentioned that it seemed a little dense and wondered if they had overbeaten the batter. Seemed plausible. I also thought about making additional espresso syrup to better soak the cakes in (we’ll get to that later). Somehow I ended up browsing through the rest of Smitten Kitchen’s celebration cakes and found what I had been looking for—a recipe for Espresso Chiffon Cake. Chiffon cakes are very light and airy thanks to whipped egg whites being folded into the batter. It seemed perfect to me—Tiramisu Cake made with the espresso chiffon as a base instead of the original white sponge cake. My brilliant idea was validated when I scrolled through the comments to find Smitten Kitchen herself mentioned she wanted to give this very combo a try sometime.
The result was WONDERFUL! I definitely like the texture of this cake much better than the last. Jason also agreed that it was a winning combination ….and what he would be expecting on his birthday until the day he dies. So I guess I will have plenty of time to continue to perfect!
A word of warning—while this cake is absolutely delicious it is not a quick and easy recipe (as you can see from the very long recipe that follows). I think I spent at least 2 hours in the kitchen Tuesday night making this cake (although that included the time needed for the cakes to cool). It has many parts—cake layers (three of them if you use the espresso chiffon cake), espresso syrup, a filling, and a frosting. But the effort is well worth it, believe you me.


Tiramisu Cake
Adapted from Smitten Kitchen—basically I took parts of two recipes and put them together. You can find the original versions of both here and here.
Ingredients:
For the cake layers:
¼ cup vegetable oil (I used canola)
6 eggs, whites and yolks separated
6 TBL of freshly brewed espresso or hydrated espresso powder* (I went with the latter- although the original recipe says doing might be too bitter, I did not have that issue)
2 teaspoons vanilla extract
1 1/3 cups cake flour
1 ½ cups sugar
1 teaspoon baking powder
½ teaspoon cinnamon (only thing I would change next time is to decrease this to ¼ teaspoon—I found it to be a bit much)
½ teaspoon salt
½ teaspoon cream of tartar
* to make, I took about three TBL of espresso powder and added ¼-1/2 cup boiling water
For the espresso extract:
2 TBL espresso powder
2 TBL boiling water
For the espresso syrup:
½ cup water
1/3 cup sugar
1 TBL coffee-flavored liqueur or brandy (I used the former)
For the filling and frosting:
2 8-ounce containers mascarpone cheese
1 cup powdered sugar
3 teaspoons vanilla extract
2 TBL coffee-flavored liqueur or brandy
2 cups cold heavy cream
½ cup mini chocolate chips
Cocoa powder or chocolate-covered espresso beans for decoration (optional)
To make the cake layers:
1.Preheat oven to 350. Line the bottom of three 8- or 9- inch round cake pans with parchment or waxed paper but do not grease.
2.In a medium bowl, combine egg yolks, espresso and vanilla. Whisk lightly to blend. In a large bowl stir together flour, 1 cup of the sugar, baking powder, cinnamon, and salt. Set aside.
3.Whip egg whites with the cream of tartar on medium-low until frothy. Raise the miser speed to medium-high and slowly add remaining sugar. Continue to beat until soft peaks—DO NOT WHIP UNTIL STIFF PEAKS as cake will shrink excessively during cooling.
4.Add egg yolk mixture to dry ingredient and fold together just enough to combine. Add ¼ of egg whites and fold them in until just combines. Lightly fold the remaining egg whites just until no streaks remain. Divide evenly among the pans.
5.Bake for about 18 minutes or until a cake tester/wooden toothpick comes out clean. Allow to cool completely in the pans. When cooled, run a butter knife around the edge of the pan to release the cakes. Invert onto wire racks and remove the paper liners.
To make the extract:
Stir espresso and boiling water together in a small cup until blended. Set aside. (Note if you use the hydrated espresso for the cake layers, you will have enough to skip this step)
To make the syrup:
Stir water and sugar together in a small saucepan and bring just to a boil. Remove from heat and 1 TBL of espresso extract and the liqueur or brandy. Set aside.
To make the filling and frosting:
Note: do not do this until you are ready to assemble the cake!
Put the mascarpone, sugar, vanilla, and liqueur in a large bowl and whisk until just blended and smooth (It helps if you let the mascarpone come to room temperature before making). Whisk heavy cream (with an electric mixer if you have one) until it holds firm peaks. Switch to a rubber spatula and stir ¼ of the whipped cream into the mascarpone mixture. Fold the rest of the whipped cream in lightly.
To assemble the cake:
1.Line some counter space with parchment or waxed paper and carefully place each cake layer on the paper. Soak each cake layer with the espresso syrup. You can use a pastry brush or spoon—I recommend pouring it carefully over the top and then spooning it around to make sure the entire layer is covered. I’d actually recommend doing this BEFORE you make the filling/frosting.
2.Place strips of waxed paper or parchment paper around your cake plate. Place the bottom cake layer on the plate (the strips will help keep the plate clean during the icing process—trust me, it’s important). Smooth about 1 cup of the mascarpone cream over the layer and sprinkle half of the chocolate chips across the top. Top with the second layer of cake and do the same. Add the top layer.
3.Whisk the remaining 1-2 TBL of espresso extract into the remaining mascarpone cream (depending how coffee-y you like). Note: I actually forgot to do this part this time and it still tastes awesome so you can skip if you want to.
4.Smooth the frosting around sides and top of the cake. It’s good to start with a light layer (also called a crumb coat), and then go back over the entire thing with the remaining icing. I clearly haven’t mastered the art of icing (I chalk part of it up to icing at 10:30 at night) but just remember that whatever it looks like, it will taste good.
5.Decorate with espresso beans if you want to or you can dust the entire top with cocoa powder (Smitten Kitchen used a template to make a star shape on the top of hers)—whatever floats your boat.
6.Refrigerate for at least 3 hours or overnight in order for the flavors to meld.
Thursday, June 3, 2010
Jason's Birthday Fiesta, Part 2
In trying to come up with something to go with Jason’s fish taco birthday dinner, I immediately thought of some kind of corn. Jason and I are both big fans of corn on the cob and fresh corn in general. I am not a huge canned vegetable person, and while frozen is okay, it really is hard to beat fresh vegetables when possible. Fortunately, June means fresh corn is starting to make its way into grocery stores (although I know it is not really corn season yet which means it’s been shipped in from somewhere else, going against everything Barbara Kingsolver has been trying to teach me in Animal, Vegetable, Miracle but that is a different post altogether). Rather than going with the usual corn on the cob I thought a corn salad would be a good variation on the flavor we love.
A couple of days after making this decision I ran across a recipe for just the thing on Martha Stewart’s website—Grilled Corn, Heirloom Tomato, Avocado, and Arugula Salad. Not having a grill, I ended up boiling the corn instead and nixed the heirloom tomatoes (which were not yet available in our usual grocery store) in favor of grape tomatoes instead. It turned out wonderfully. The perfect summery side for a summery birthday meal. I can’t wait to make it again (and again) this summer with fresh corn and tomatoes from our local Farmers Market.

Corn, Tomato, Avocado, and Arugula Salad
Adapted from MarthaStewart.com
Ingredients:
4 ears fresh corn, husks removed
¾ pint of grape tomatoes, halved
1 cup chopped cilantro leaves
½ jalapeno, seeded and finely chopped
2 cups of arugula
Juice of 2 limes (next time I think I’d use more)
3 TBL red wine vinegar
¼ cup olive oil (I may have used slightly less)
1 avocado, pitted, peeled and diced
1.Bring a large pot of water to a boil over high heat. Add corn to boiling water and cook for about 10-12 minutes until done but still crisp. Drain and immediately rinse with cold water (you could also use an ice bath but I was using all available counter space getting the fiesta together so decided to go without).
2.Once corn has cooled enough to handle, cut kernels from cobs. Transfer to a large bowl and add tomatoes, cilantro, jalapeno, and arugula. Season with salt and pepper.
3.In a small bowl, mix together lime juice, red wine vinegar, and olive oil. Set aside.
4.Right before serving, chop the avocado and add to bowl. Pour the lime juice mixture over the salad and toss to combine.
Wednesday, June 2, 2010
Jason's Birthday Fiesta, Part 1
It’s Jason’s Birthday Week!
HAPPY BIRTHDAY TO THE BEST HUSBAND AROUND!
As you may recall, my birthday celebrations tend to revolve around what restaurant I want to try out. But Jason requested a home cooked meal and, fortunately for him, I really enjoy planning special occasion/holiday meals. (In fact, I’ve pretty much had this meal planned out for weeks.) Of course, since he is the man of honor, Jason had most of the say in what his birthday dinner consisted of. His requests--- fish tacos (shocker!) and tiramisu cake. Here is how I chose to round out the menu:
Although Jason was a huge fan of the fish tacos I made last month I decided to make a few tweaks. The first was to sprinkle the tilapia with a little Baja seasoning before sticking it under the broiler. This idea came from a fish dish Jason likes to get from the Whole Foods out in Fairfax, VA where they have several mini restaurants serving really good food at incredibly reasonable prices (seriously—if you haven’t been and you live in the DC area…go!).
The second was to swap the chopped white onion for pickled onions! One of our favorite Mexican places serves shrimp tacos with these delicious pickled onions on top and I’ve long wondered how to make them at home. Enter Smitten Kitchen and her recipes for pickled onions. They were actually pretty close to what is served at Taqueria Poblano (a little less sweet maybe) and definitely a good addition to our fish tacos. All in all, a very successful meal :)


Pickled Onions
From Smitten Kitchen
Ingredients:
½ large red onion, thinly sliced
½ cup red wine vinegar
½ cup cold water
2 TBL coarse salt
1 TBL sugar
2 dashes hot sauce.
Combine all of the ingredients into a bowl or mason jar and refrigerate overnight.
Stay tuned for more birthday dinner extravaganza recipes later this week!
HAPPY BIRTHDAY TO THE BEST HUSBAND AROUND!
As you may recall, my birthday celebrations tend to revolve around what restaurant I want to try out. But Jason requested a home cooked meal and, fortunately for him, I really enjoy planning special occasion/holiday meals. (In fact, I’ve pretty much had this meal planned out for weeks.) Of course, since he is the man of honor, Jason had most of the say in what his birthday dinner consisted of. His requests--- fish tacos (shocker!) and tiramisu cake. Here is how I chose to round out the menu:
- Roasted tomatillo salsa and tortilla chips
- Fish tacos with cabbage and lime (with a few twists—more on that in a minute)
- Corn and tomato salad with avocado and arugula (recipe coming up tomorrow)
- Tiramisu cake (recipe coming Friday)
Although Jason was a huge fan of the fish tacos I made last month I decided to make a few tweaks. The first was to sprinkle the tilapia with a little Baja seasoning before sticking it under the broiler. This idea came from a fish dish Jason likes to get from the Whole Foods out in Fairfax, VA where they have several mini restaurants serving really good food at incredibly reasonable prices (seriously—if you haven’t been and you live in the DC area…go!).
The second was to swap the chopped white onion for pickled onions! One of our favorite Mexican places serves shrimp tacos with these delicious pickled onions on top and I’ve long wondered how to make them at home. Enter Smitten Kitchen and her recipes for pickled onions. They were actually pretty close to what is served at Taqueria Poblano (a little less sweet maybe) and definitely a good addition to our fish tacos. All in all, a very successful meal :)


Pickled Onions
From Smitten Kitchen
Ingredients:
½ large red onion, thinly sliced
½ cup red wine vinegar
½ cup cold water
2 TBL coarse salt
1 TBL sugar
2 dashes hot sauce.
Combine all of the ingredients into a bowl or mason jar and refrigerate overnight.
Stay tuned for more birthday dinner extravaganza recipes later this week!
Tuesday, June 1, 2010
Let Him Eat Bread
Have I told you how much Jason loves bread? Not as much as my cousin who was known for eating his weight in yeast rolls every Christmas Eve (and who ate 2/3 of The Liberty Tavern bread basket when he was in town last week), but a lot. Don’t get me wrong, I love bread too but I have come to realize that eating 3-4 dinner rolls with a meal is probably not the best thing to do on a regular basis. Jason has no such will power when it comes to bread (especially bread slathered with butter), so I have significantly cut down on the amount of bread I serve at dinnertime.
Despite this, I got it in my head this week that I needed to make some homemade bread. Maybe it’s because this is Jason’s birthday week and I am feeling more eager to please than usual (SPOILER ALERT—lots of yummy birthday dinner recipes coming your way the rest of the week!). Or maybe it’s because I am in the middle of Animal, Vegetable, Miracle and have become somewhat enamored with the author’s self-sufficient lifestyle and am trying to emulate it in some small way. Whatever the reason, I made bread.
Now this is not my first bread—that honor goes to the it’s-so-good-you-will-never-believe-it’s-this-easy-to-make No-Knead Harvest Bread from King Arthur Flour. But that is a fall/winter bread to me. So I decided to give Serious Eats’ recipe for The Simplest White Bread Ever a try.
It definitely lived up to its name! It requires minimal kneading and no special equipment (unlike the no-knead method which requires a dutch oven). While it did not look as nice as the pictures that went a long with the original recipe, it was not bad for a first try. And the taste---according to Jason it was just plain good (which is definitely a compliment). I had one piece with our big dinner salad tonight. Jason, of course, had two. I guess it could be worse!


Simplest White Bread Ever
From Serious Eats
Ingredients:
1 tablespoon white sugar
2 1/2 teaspoons (1 package) yeast
1 cup lukewarm water
2 1/2 cups (11 1/4 oz) all purpose flour
1 teaspoon salt
2 tablespoons olive oil
1. Add the sugar and yeast to the water in your measuring cup and stir to combine. If you're using anything except an instant yeast, let it sit for 5 to 10 minutes, or until the mixture is lively and bubbly. If it's instant yeast, you can continue without proofing, or let it proof to ease your mind that the yeast is alive—your choice.
2. Put the flour and salt into a medium bowl, and stir to distribute salt.
3. Add the water/yeast mixture to the bowl with the flour, and stir to combine all the ingredients.
4. Sprinkle some flour on your countertop and dump the dough mixture onto the counter. Knead for a minute or two, adding flour as necessary to keep it from sticking. You don't need to knead until the dough is stretchy and elastic - just knead until it's a nice cohesive mixture and not a lumpy, sticky, blobby mess. Form it into a ball.
5. Drizzle the olive oil into a zip-top bag and plop the dough into the bag. Make sure the dough is completely coated with olive oil, zip the top, and stash it in the refrigerator overnight.
6. The next day, take the bag out of the fridge and massage it a bit, still in the bag, to mash out all the bubbles in the dough. You may need to open the bag to let the air out, but reseal it after.
7. Leave the bag on the countertop until the dough has come to room temperature, about an hour. It will rise and expand a bit during that time.
8. Preheat the oven to 350°F. Sprinkle some cornmeal on the bottom of a loaf pan.
9. Sprinkle some flour on your countertop, and dump the dough onto the counter. You don't need to squeeze every bit of olive oil out of the bag, but don't try to hold it back, either.
10. Knead and fold it a bit to incorporate the olive oil into the dough, then form the dough into a log that will fit into your loaf pan.
11. Put the loaf into the pan, cover the pan with plastic wrap, and let it rise until it has at least doubled in size. I used a 9 x 5 inch loaf pan and let it rise until it was about even with the pan (1 hour or so).
12. Remove the plastic wrap, slash the top with a knife, and bake at 350 degrees for 35 to 40 minutes, until the bread is golden brown and the loaf sounds hollow when tapped.
13. Let it cool completely on a rack before slicing.
Despite this, I got it in my head this week that I needed to make some homemade bread. Maybe it’s because this is Jason’s birthday week and I am feeling more eager to please than usual (SPOILER ALERT—lots of yummy birthday dinner recipes coming your way the rest of the week!). Or maybe it’s because I am in the middle of Animal, Vegetable, Miracle and have become somewhat enamored with the author’s self-sufficient lifestyle and am trying to emulate it in some small way. Whatever the reason, I made bread.
Now this is not my first bread—that honor goes to the it’s-so-good-you-will-never-believe-it’s-this-easy-to-make No-Knead Harvest Bread from King Arthur Flour. But that is a fall/winter bread to me. So I decided to give Serious Eats’ recipe for The Simplest White Bread Ever a try.
It definitely lived up to its name! It requires minimal kneading and no special equipment (unlike the no-knead method which requires a dutch oven). While it did not look as nice as the pictures that went a long with the original recipe, it was not bad for a first try. And the taste---according to Jason it was just plain good (which is definitely a compliment). I had one piece with our big dinner salad tonight. Jason, of course, had two. I guess it could be worse!

Yeast proofed and ready to go

After a quick knead

After a night's rest in the fridge

Slashed and ready to go into the oven

Simplest White Bread Ever
From Serious Eats
Ingredients:
1 tablespoon white sugar
2 1/2 teaspoons (1 package) yeast
1 cup lukewarm water
2 1/2 cups (11 1/4 oz) all purpose flour
1 teaspoon salt
2 tablespoons olive oil
1. Add the sugar and yeast to the water in your measuring cup and stir to combine. If you're using anything except an instant yeast, let it sit for 5 to 10 minutes, or until the mixture is lively and bubbly. If it's instant yeast, you can continue without proofing, or let it proof to ease your mind that the yeast is alive—your choice.
2. Put the flour and salt into a medium bowl, and stir to distribute salt.
3. Add the water/yeast mixture to the bowl with the flour, and stir to combine all the ingredients.
4. Sprinkle some flour on your countertop and dump the dough mixture onto the counter. Knead for a minute or two, adding flour as necessary to keep it from sticking. You don't need to knead until the dough is stretchy and elastic - just knead until it's a nice cohesive mixture and not a lumpy, sticky, blobby mess. Form it into a ball.
5. Drizzle the olive oil into a zip-top bag and plop the dough into the bag. Make sure the dough is completely coated with olive oil, zip the top, and stash it in the refrigerator overnight.
6. The next day, take the bag out of the fridge and massage it a bit, still in the bag, to mash out all the bubbles in the dough. You may need to open the bag to let the air out, but reseal it after.
7. Leave the bag on the countertop until the dough has come to room temperature, about an hour. It will rise and expand a bit during that time.
8. Preheat the oven to 350°F. Sprinkle some cornmeal on the bottom of a loaf pan.
9. Sprinkle some flour on your countertop, and dump the dough onto the counter. You don't need to squeeze every bit of olive oil out of the bag, but don't try to hold it back, either.
10. Knead and fold it a bit to incorporate the olive oil into the dough, then form the dough into a log that will fit into your loaf pan.
11. Put the loaf into the pan, cover the pan with plastic wrap, and let it rise until it has at least doubled in size. I used a 9 x 5 inch loaf pan and let it rise until it was about even with the pan (1 hour or so).
12. Remove the plastic wrap, slash the top with a knife, and bake at 350 degrees for 35 to 40 minutes, until the bread is golden brown and the loaf sounds hollow when tapped.
13. Let it cool completely on a rack before slicing.
Subscribe to:
Posts (Atom)